Syncing Mind Elixir Desktop Mind Maps with Git
A comprehensive tutorial on how to use Git and GitHub to sync Mind Elixir Desktop mind maps across multiple devices while maintaining privacy and enjoying seamless collaboration.
As a cross-platform mind mapping tool, Mind Elixir Desktop addresses a common need among users: syncing data across multiple devices. Unlike other online mind mapping tools, Mind Elixir Desktop uses a local storage strategy, giving you complete control over your data.
Today, I'll share a complete solution using Git + GitHub for data synchronization that protects your privacy while providing the convenience of multi-device collaboration.
Why Choose Git Sync?
Compared to cloud storage sync, the Git approach offers several distinct advantages:
- Version Control: Every modification is recorded, making it easy to recover from accidental deletions
- Completely Free: GitHub provides free private repositories
- Cross-Platform Support: Works on Windows, macOS, and Linux
Step 1: Locate the Data Folder
Open Mind Elixir Desktop and find the "Open Data Folder" option in the settings.
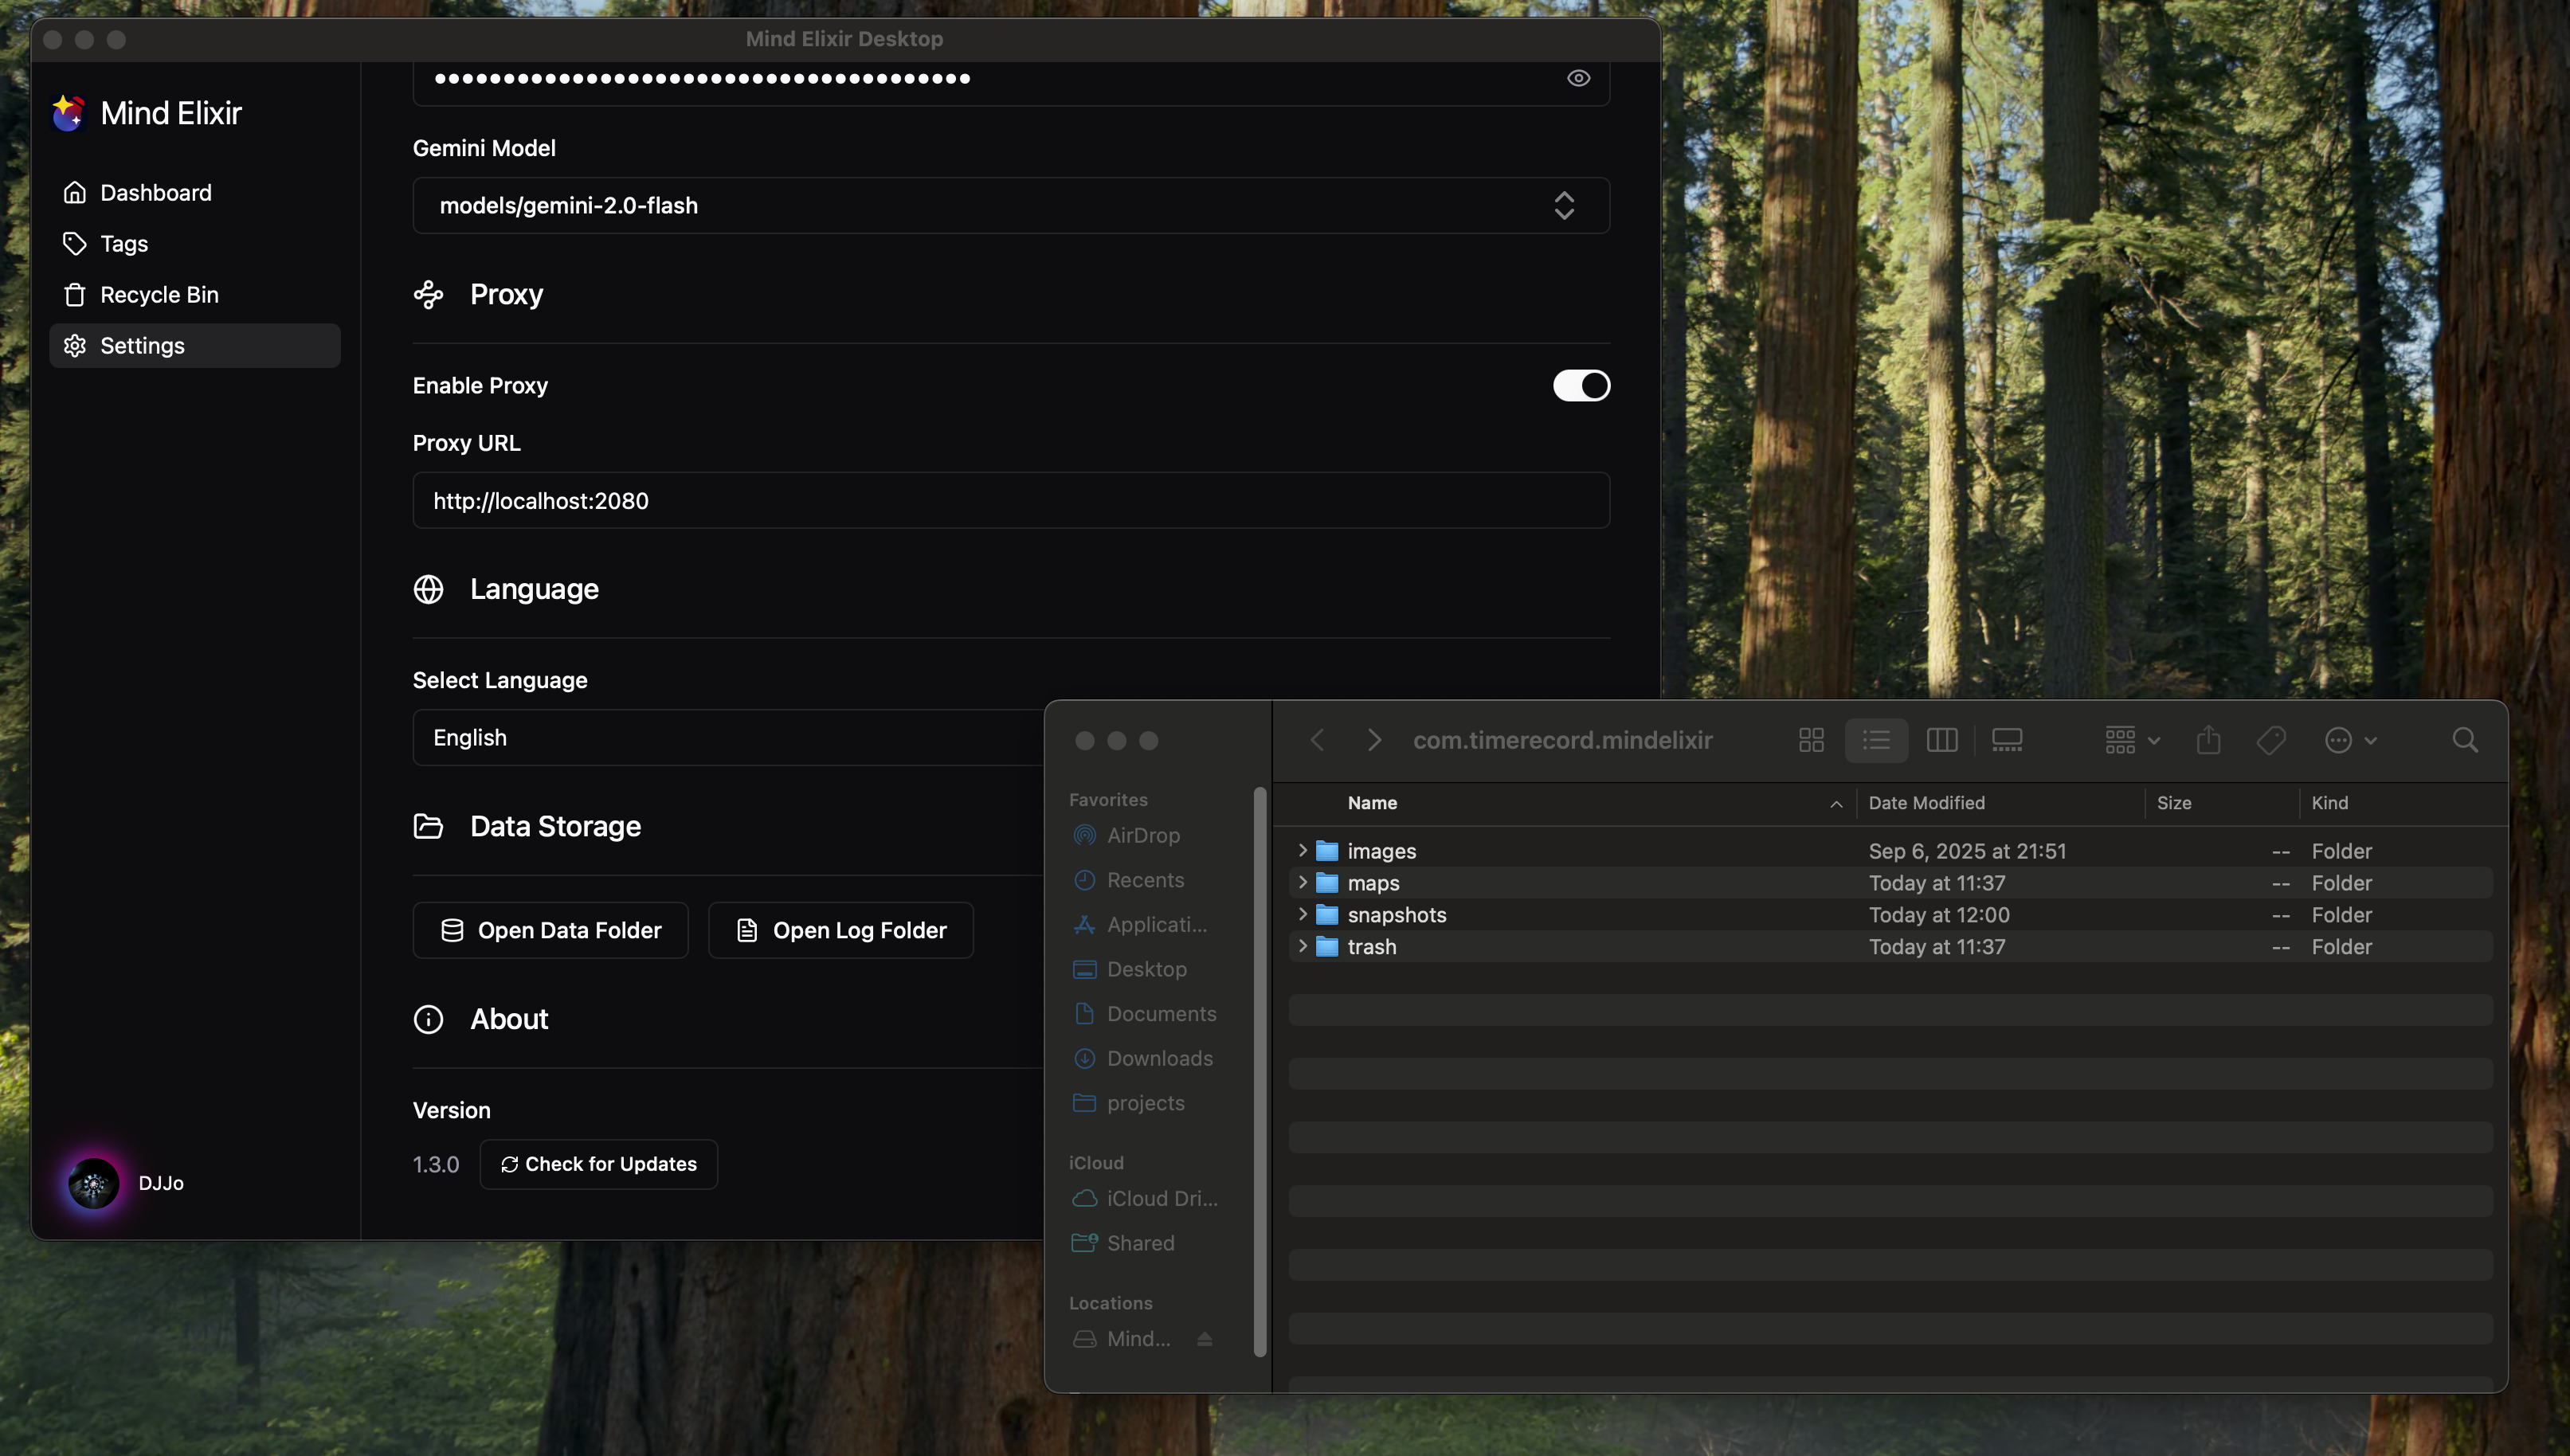
Clicking this will directly open the directory where your mind map files are stored.
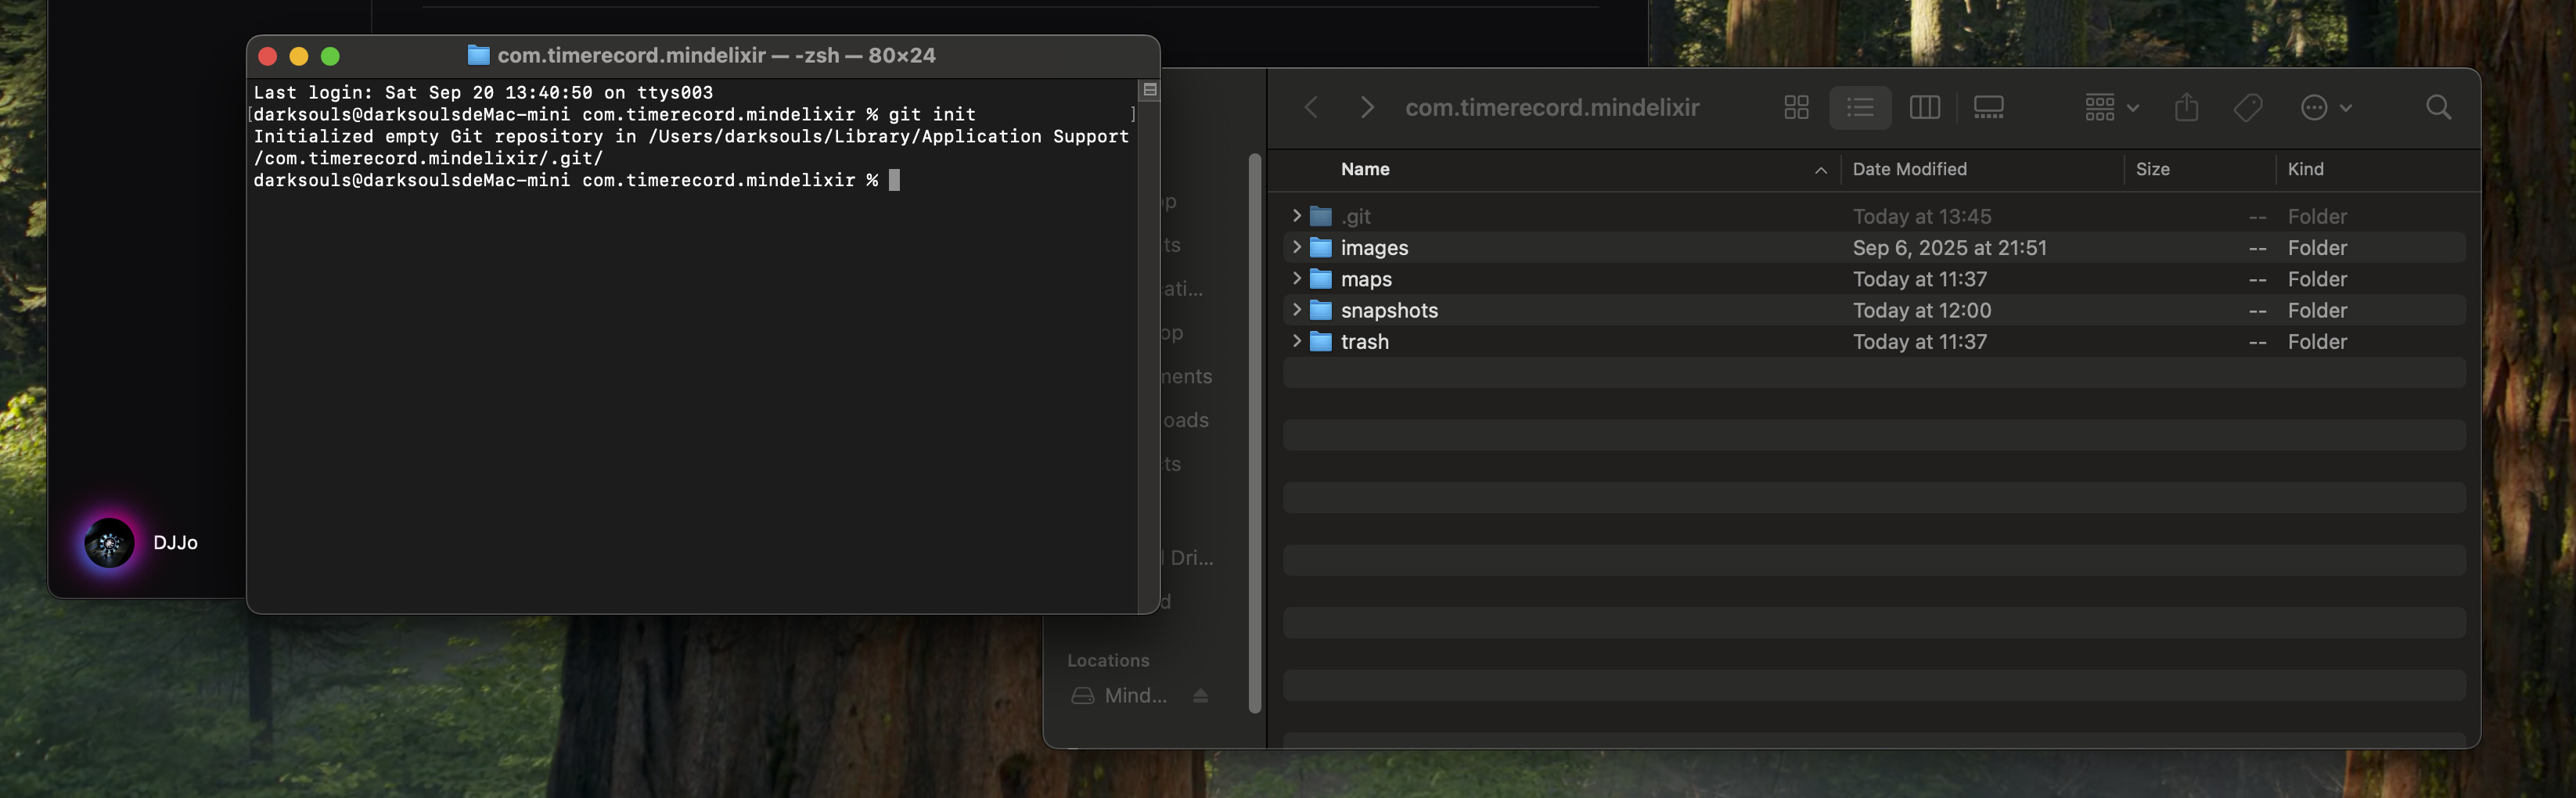
Step 2: Initialize Git Repository
Open a terminal in the data folder (Windows users can hold Shift and right-click in an empty area of the folder, then select "Open command window here"), then execute:
git init
Step 3: Create GitHub Repository
- Log in to GitHub, click the "+" button in the top right corner, and select "New repository"
- You can name the repository
mind-elixir-backupor any other name you prefer - Important: Select Private to protect the privacy of your mind maps. Of course, if you want to share your mind maps, you can choose Public
- Don't check "Add a README file" since we already have local files
Step 4: Configure Ignore File (Optional)
You can optionally create a .gitignore file in the data folder to avoid syncing large thumbnail files:
snapshots
Thumbnails will be automatically generated after syncing, but this takes some time.
Step 5: Initial Commit and Push
Following the instructions on your GitHub repository page, execute the following commands:
# Add all files to staging area
git add .

# Create initial commit
git commit -m "Initial commit: Mind Elixir data backup"

# Add remote repository URL (replace with your repository URL)
git remote add origin https://github.com/your-username/mind-elixir-backup.git

# Push to GitHub
git push -u origin main
Daily Usage: Sync Workflow
⚠️ Important Reminder: Sync Before Starting
Strongly recommended: Before starting Mind Elixir Desktop each time, first pull the latest remote updates:
# Navigate to data directory
cd "Mind Elixir data directory path"

# Pull latest updates
git pull
Why do this?
- Avoid file conflicts: If multiple devices edit the same mind map simultaneously, the device that syncs later will create conflicts
- Reduce hassle: Git conflict resolution is complex for beginners - prevention is better than cure
- Protect data: Ensures you're always working on the latest version, avoiding accidental overwrites
💡 Best Practice: Develop the habit of "pull first, use, then push."
Push Updates When Finished
After using Mind Elixir Desktop, develop the habit of pushing updates:
# Check changes
git status

# Add changed files
git add .

# Commit changes (recommend writing clear descriptions)
git commit -m "Update project planning mind map"

# Push to remote
git push
Pull Latest Data on New Device
For initial setup on another device:
# Clone repository locally
git clone https://github.com/your-username/mind-elixir-backup.git
Daily workflow for new devices:
- Must do before starting:
# Pull latest changes
git pull
-
Use Mind Elixir Desktop
-
After finishing work:
git add .
git commit -m "Update description"
git push
Advanced Tips
1. Set Up Aliases to Simplify Commands
# Set up shortcut command
git config alias.sync '!git add . && git commit -m "Auto sync $(date)" && git push'

# Then you only need to run
git sync
2. Automation Scripts
Create a batch file (Windows) or shell script (macOS/Linux) that you can double-click to complete synchronization:
Windows (sync.bat):
@echo off
cd /d "C:\Users\your-username\AppData\Roaming\mind-elixir-desktop"
git pull
git add .
git commit -m "Auto sync %date% %time%"
git push
pause
macOS/Linux (sync.sh):
#!/bin/bash
cd ~/Library/Application\ Support/mind-elixir-desktop
git pull
git add .
git commit -m "Auto sync $(date)"
git push
3. Conflict Resolution
If conflicts arise from multiple users or devices, Git will prompt you to resolve them manually. For mind map files, I recommend:
Using VSCode to Resolve Conflicts (Recommended):
- Download and install: Visual Studio Code Official Website
- VSCode provides an intuitive conflict resolution interface where you can clearly see:
- Current Change
- Incoming Change
- Detailed comparison between both
- Supports one-click selection of which version to keep, or manual content merging
Conflict Resolution Steps:
- When
git pullindicates a conflict, open the project folder with VSCode - Conflicted files will show an "M" marker in the sidebar
- Click on the conflicted file, and VSCode will display a segmented comparison interface
- Choose "Accept Current Change," "Accept Incoming Change," or "Accept Both Changes"
- After saving the file, run:
git add .
git commit -m "Resolve conflicts"
git push
Manual Resolution Suggestions:
- Back up the current version
- Choose to keep one version
- Manually merge important content
Summary
With the Git + GitHub solution, you can:
- ✅ Seamlessly sync mind maps across multiple devices
- ✅ Maintain complete control over your data
- ✅ Enjoy the security that version control provides
- ✅ Collaborate and share mind maps with team members
While this solution requires some technical foundation, once configured, it's very smooth to use. If you're new to Git, I recommend familiarizing yourself with basic commands first, or consider using graphical Git tools like GitHub Desktop.
Mind Elixir Desktop's design philosophy is excellent—it protects user privacy while providing sufficient flexibility. Combined with Git's powerful features, you can create a better user experience than online tools.